|
|
 |
 |
 |
|
PART 3: Pre-production
Pre-production covers all the activities between the final draft of the script and the first day of shooting. There are two main goals for this period:
 As directors, the students understand what’s needed to be ready to direct their own projects As directors, the students understand what’s needed to be ready to direct their own projects
As producers, the students learn what’s needed in preparing to produce their projects
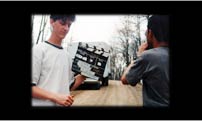
During the pre-production period there are seven video exercises, and each student brings his/her edited version of each exercise to class (no longer than 10 minutes).
VIDEO EXERCISE 3: First Casting Exercise
Choose a minimum of three actors/actresses for each of the main characters in your script. Record each actor/actress in the same way, with the same text, and framed the same way. This exercise allows students to properly compare individuals and chose the right ones to fill the roles.
VIDEO EXERCISE 4: Second Casting Exercise
Very often, students are unable to choose the final cast after only one casting session. This exercise is a “recall” — a new casting session using actors/actresses from the short list of best possibilities. Also, use this casting session as a first chance try some actors/actresses together to find out how they are match with each other.
VIDEO EXERCISE 5: Actors Exercise
Take one scene from the script and realize it with two different approaches, based on the script, but allowing some improvisation. Doing this will show how the script can be developed with the actors’ help and how written characters can be adapted to the personality and talents of the actors.
VIDEO EXERCISE 6: One Scene, Two Approaches
Shoot one scene from the script in two different ways:
The Master Shot: The whole scene is covered in a single moving shot, using all the standard camera positions from closeup to longshot.
Coverage Shots: The same scene with the same action as above, made in five to ten shots.
This exercise is helpful in understanding the basic challenge of film grammar: how to translate scenes from the script into shots, and how to shoot them so that later they can be joined in continuity.
VIDEO EXERCISE 7: Opening Scene
Shoot the first scene from the film in a few different ways. This helps to find the proper visual language and rhythm for the project.
VIDEO EXERCISE 8: Climax Exercise
Identify and shoot your climax scene. Very often students miss the crucial turning point, the most important moment in the whole story. This exercise helps focus and find the best way to clearly present this critical moment.
VIDEO EXERCISE 9: Video Storyboard
The last and the most important video exercise. The entire project shot on video, on location, without proper lighting, costumes or make up. This video storyboard, or sketch, is an excellent exercise to help with final decisions on blocking the actors, staging the camera, and choices of lens and lens angles. Above all else, this exercise helps students and instructors to check the arc of the story, the clarity of the characters, and the way the story should be shoot.
Presentation
At the end of the Pre-production period, each student gives a 10-15 minute public presentation of the project by pitching the story, screening some of the video exercises, and presenting some music, pictures, and photos. Example scenes from other films are also shown to demonastrate how the students want to approach their stories.

PART 1: Research
PART 2: Script
PART 3: Pre-production
PART 4: Production
PART 5: Post-production
|
|

2
CD-ROM SET
WINDOWS
/ MACINTOSH
How
To Make Your Movie
an
interactive film school
|
| |
|
|
|
|
|
|